
The show is now available on the Spotify app!
Butter
Today on The Kitchen Counter we take a look at that most indispensable ingredient for the home cook and baker: butter. Listen to the episode for butter history, tips on using butter in the kitchen, and instructions on how to make your own butter at home!
How to Make Butter at Home
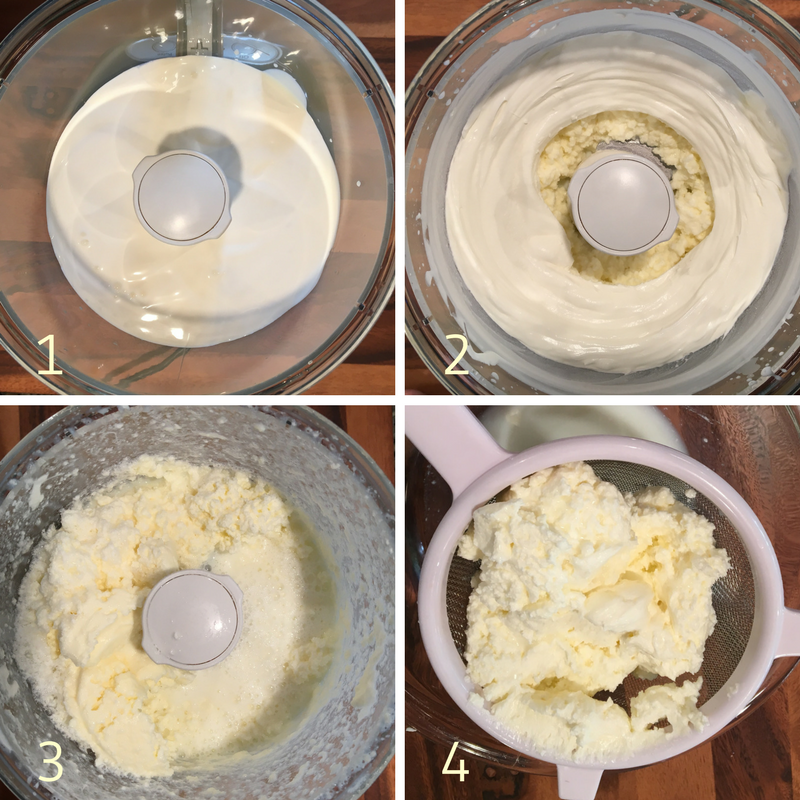
Whipping up a fresh batch of table-ready butter is so easy you can pull it off before the rolls are even out of the oven! All you need is heavy whipping cream. One 32 ounce container of heavy whipping cream will make about 16 ounces of butter, or approximately 4 sticks. You can make butter in a stand mixer, food processor, in a bowl with a hand mixer, or even a blender, and the instructions will be similar. The following instructions use a food processor.
Step One
Pour the heavy whipping cream into a food processor container set up with the regular blade attachment. Turn the processor on. After about 6 to 8 minutes, the cream should resemble very thick whipped cream. Keep processing!
Step Two
After just another minute or two, the butter fat will start to separate from the cream and form lumpy or “cottage cheese” looking curds (see panel 2 below). You may need to stop the food processor and use a spatula or spoon to scrape down the cream from the sides of the container. Return the lid and continue processing until the cream has separated into butter fat and buttermilk (see panel three below).
Step Three
Drain the buttermilk and remove the curd from the food processor and transfer to a fine mesh strainer over a bowl (see panel 4 below). “Wash” the butter by pouring ice water over the strainer to help remove excess buttermilk. You can either push the butter through the strainer to help remove liquid or alternatively you can force out liquid by pressing the butter against the side of the bowl with a wooden spoon. Repeat until no visible liquid comes out of the butter. The more buttermilk you extract, the longer your homemade butter will last before spoiling. That is it! Your butter is ready!
You can mix in a little salt for flavor if you like. Note your butter will be very soft at this point. It will become much more firm after you store it in the fridge for an hour or so. Your butter will easily last a week in the fridge, or up to three weeks if you removed all of the buttermilk successfully.
How to Make Clarified Butter
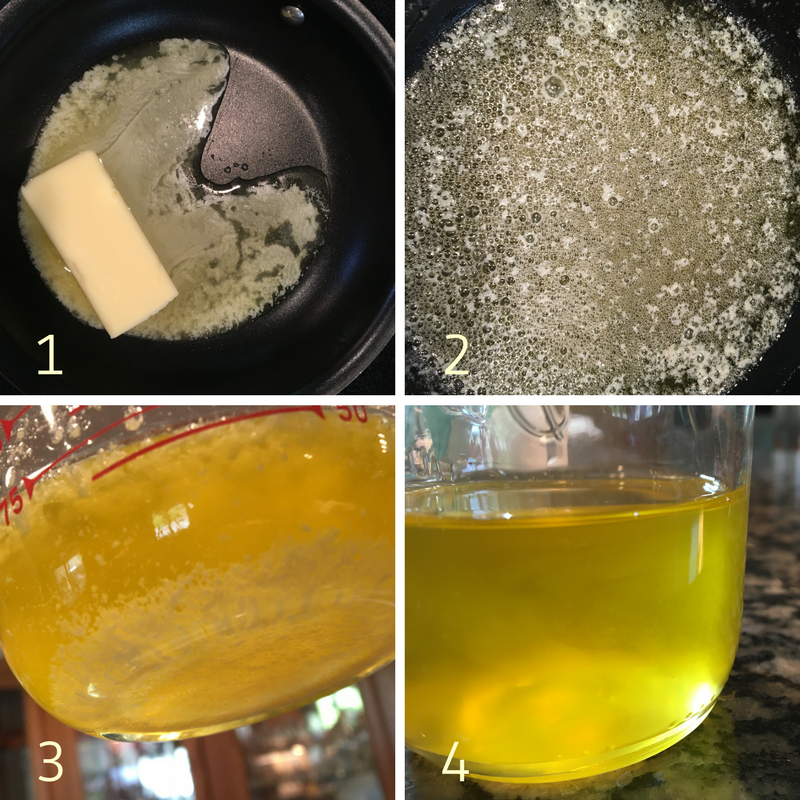
Clarifying butter is the process of rendering the butter to separate the pure butterfat from the milk solids and water. It is a quick and easy process done right on the stovetop. One stick of butter (4 ounces) should produce roughly 3 ounces of clarified butter
Step One
Heat butter in a pan over medium heat (see panel 1 below).
Step Two
As the butter melts and heats up, the butter will foam. This is the water cooking out of the butter.
Step Three
When the butter stops foaming you are ready to separate the clarified butter. I poured my clarified butter into a glass container so you could see what the milk solids look like when they separate (see panel 3 below). The easiest method to remove the solid is to pour through a coffee filter or two layers of cheesecloth into a jar. You’ll end up with a golden liquid which is clarified butter (see panel 4 below).
The clarified butter should last for several months in the fridge. Note that it will solidify, but can easily be returned to liquid by gently warming before use.
Connect with The Kitchen Counter Podcast!
Facebook: https://www.facebook.com/kitchencounterpodcast
Twitter: @TKCpodcast
Email: feedback@kitchencounterpodcast.com
If you liked what you heard, please consider subscribing in Apple Podcasts or in the Google Play Music store. You can also help out the show by leaving a positive review wherever you find your favorite podcasts (you know you want to)!